Glues & Sealers Guide

i-Bead Inc. learning library · Glues & Sealers

A little glue.A better finish.

Choose the right adhesive for your materials, give it time to cure, and finish your beadwork with confidence.

Find a starting point
MATCH THE MATERIALALLOW THE CURE

Prepare · Apply · Let it cure

01

What are you making?

Start with the project, then check both surfaces and the exact formula. These are starting points for a test, not a guarantee for every coating or material.

Cabochons & findings

Fit the surfaces before choosing the glue.

For a compatible stone or glass focal and metal finding, compare E6000 Jewelry & Bead with E6000 Industrial Strength. E6000 Plus is another option where its material restrictions allow.

Check before committing: Check the underside, any foil or coating, and how much of the finding actually touches. A narrow edge is not the same as a well-fitting glue pad. For valuable stones or a heavy focal, consider a setting that mechanically retains it.

Tiny details

Use a controlled amount.

G-S Hypo Cement offers a fine applicator for small, non-porous parts. For a faster contact-bonding option, compare QuickHOLD and Quick Grip.

Check before committing: Dry-fit first. QuickHOLD becomes difficult to reposition after its coated surfaces meet. G-S Hypo is a medium-strength cement; do not treat it as a universal structural adhesive.

Fabric & embellishments

Keep the finished piece flexible.

For fabric work, start by comparing E6000 Fabri-Fuse and Hi-Tak Gem Glue. For leather or suede, check the labelled uses on Craft Medley Leather & Suede Glue.

Check before committing: Test the actual backing and fabric together. A glue suitable for an embellishment still needs to suit the base material. Washability of the glue does not make every bead, trim or garment washable.

Paper beads & finishing

Separate the bond from the coating.

Use an adhesive labelled for your paper to hold the rolled tip, then choose a compatible finish. Our Plaid gloss spray is a surface sealer; it is not the glue that holds the roll together. See the paper-bead test below.

Check before committing: Do not substitute QuickHOLD or E6000 Industrial Strength for paper glue: the current technical sheets exclude paper products. Test any coating on the same paper and print before finishing your beads.

Knots & elastic

The knot comes first.

For Stretch Magic, Pepperell recommends a surgeon’s knot or Carrick bend. Use the cord maker’s finishing instructions before deciding whether an adhesive is needed. Check the compatibility guide.

Check before committing: A glue being flexible does not prove that it suits every elastic or thread. If adding adhesive, verify the exact cord and glue combination and test a spare knotted piece through its full cure. Glue does not correct an insecure knot.

Coated or delicate pieces

Protect the finish you want to keep.

Identify paint, foil, plating, dye, pearl coatings and any existing sealer before choosing an adhesive. Use a spare component or hidden area for your test. Read the care guide.

Check before committing: Stop if the test shows colour transfer, haze, swelling or peeling. Do not sand a decorative coating or assume a solvent listed for glue cleanup is safe on your bead. Ask us about the exact materials when you are unsure.

02

Know the product in your hand.

These products are carried by i-Bead Inc. in store and online. Open a product link for current availability. Similar names do not make adhesives interchangeable.

01

Precision

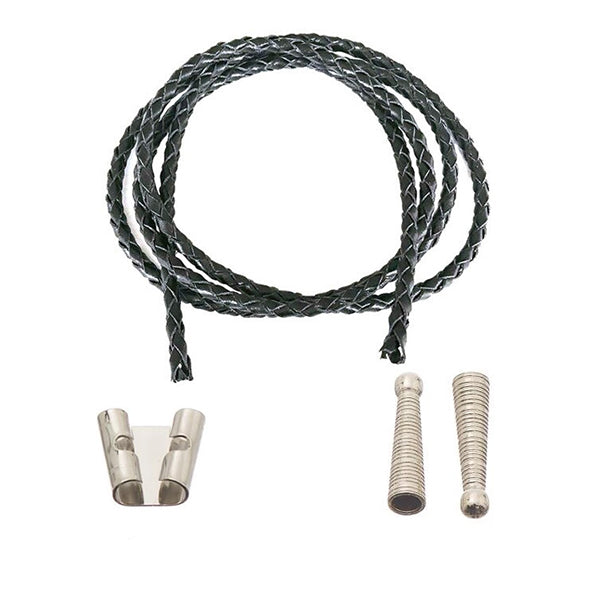
G-S Hypo Cement

A clear, flexible, medium-strength cement for small non-porous components. The built-in fine tip helps control placement.
Flatten the tube as you use it; do not roll or twist it. Replace the cap wire between uses. Follow G-S instructions for cleaning the applicator.
02

General assembly

E6000 Industrial Strength

For compatible mixed-material bonds where a flexible cured adhesive is useful. Test finishes and follow the instructions on your tube.

The current Craft technical sheet excludes paper products, polystyrene/Styrofoam, polyethylene and polypropylene. Keep uncured glue off visible finished surfaces.

03

Jewellery assembly

E6000 Jewelry & Bead

For attaching suitable beads, stones and jewellery findings, with precision tips for smaller applications. It cures clear and flexible.

Allow the complete cure before wearing or loading the joint. Check coatings and plastic types; a broad list of materials cannot confirm every individual finish.

04

Low odour option

E6000 Plus

A separate formula for compatible materials including metal, glass and ceramic. Low odour does not replace the handling directions on the package.

The manufacturer’s instructions exclude acrylic, vinyl, foam, polyethylene and polypropylene. For non-porous surfaces, its instructions include mating, separating for 5 minutes, then rejoining.

05

Fast contact bond

QuickHOLD

A thinner adhesive for suitable delicate embellishments and components. As a contact adhesive, coat both surfaces and wait about 2 minutes before joining, following the label.

Initial grip is not full cure. The current technical sheet excludes paper, Styrofoam/polystyrene, polyethylene and polypropylene. Dry-fit carefully before bonding.

06

Fast general bond

Beacon Quick Grip

For compatible metal, wood, glass, stone and other listed materials. Beacon instructs applying it to one surface, then pressing the parts together.

Allow 24 hours for cure, especially before putting a load on the joint. Check plastic and finish compatibility on a spare piece first.

07

Flexible fabric work

E6000 Fabri-Fuse

Made for fabric applications where flexibility matters. Apply to both surfaces, join and let the piece dry flat. It can be sewn through once dry.

Dry flat for at least 8 hours; wait 72 hours before washing. Follow the care limits of the fabric and embellishments too.

08

Embellishments

Hi-Tak Gem Glue

H. A. Kidd lists this product for non-porous embellishments including rhinestones, glass, sequins, metal and vinyl. It dries clear.

The supplier states washable after 24 hours. Follow the bottle for the application method and confirm that the complete decorated item can be washed. This is not Beacon Gem-Tac.

09

Leather & suede

Craft Medley Leather & Suede Glue

A product to consider for leather and suede projects after checking the bottle against your particular material and finish.

Test a hidden area for visible marks and changes in feel. Use the drying, curing and care instructions on the bottle; do not borrow timings from another brand’s leather glue.

10

Surface finish

Plaid Clear Acrylic Gloss Sealer

Patricia Nimocks clear gloss sealer adds a surface finish to compatible craft work. It is a coating, not an adhesive for attaching findings.

Test before coating. Follow the can for spraying distance, coats, drying and ventilation. A clear finish can change how colour and texture look; it does not guarantee waterproof paper beads.

Match the full name. E6000 Industrial Strength, Jewelry & Bead, Plus, QuickHOLD and Fabri-Fuse have their own directions. Formulas and packaging can change; the instructions for your exact tube or bottle take precedence.
03

Set, dry and cured are different stages.

An adhesive may hold its shape or feel dry before the joint is ready to wear. Film thickness, materials and room conditions can change the wait.

Manufacturer and supplier timing references
Product Early stage Before use or washing
G-S Hypo Cement Sets in about 10 minutes. About 1 hour to dry; up to 24 hours to dry completely, depending on conditions.
E6000 Industrial Strength / Jewelry & Bead Initial tack or set is not the finished bond. Allow 24 hours; maximum strength can require 48–72 hours.
E6000 Plus Follow its surface-specific application method. Allow 24 hours; maximum strength can require up to 72 hours.
QuickHOLD About 10–12 minutes to set. The application directions specify 5–8 hours for full cure.
Beacon Quick Grip About 10 minutes dry time. 24 hours to cure.
E6000 Fabri-Fuse Dry flat for at least 8 hours. Wait 72 hours before washing.
Hi-Tak Gem Glue Follow the bottle for handling time. Supplier states washable after 24 hours.
Craft Medley Leather & Suede / Plaid sealer Use the timing printed on the package. Check the stated full-cure or use time; touch-dry alone is not enough.
Plan the waiting time into your project. Support the piece so it cannot slide, keep the joint undisturbed, and wait for the specified cure before testing it. These are reference times, not countdown guarantees.
04

Finish paper beads without losing the pattern.

Make one sample bead before finishing a whole set. Your paper, ink, glue and coating need to work together.

Two separate jobs

Hold the roll. Then seal the surface.

Use a paper-compatible adhesive to secure the final tip. After it has dried as directed, test your chosen finish. The Plaid acrylic gloss sealer in our range is a spray coating; it does not replace the adhesive inside the bead.

Choose a product whose label supports the paper and coating underneath. Do not assume any clear craft glue is also a suitable bead glaze.

A small test saves a batch

Keep an uncoated comparison.

  1. Use an offcut from the same printed or coloured sheet.
  2. Apply your intended glue and finish, following their labels.
  3. Let every layer dry and the final finish cure.
  4. Compare for smudging, darkening, tackiness or peeling. If the test fails, change the combination before proceeding.

Care for the paper underneath. Keep the bead hole clear while finishing. Treat finished paper beads as water-sensitive: remove them for swimming, showering and washing up. A coating does not guarantee complete coverage of edges or holes.

Make your own with our DIY Paper Beads guide and printable templates →

05

A better bond starts before the cap comes off.

Use this checklist at your workbench. Tick the steps as you prepare; your selections stay on this page only.

Use the label’s safety instructions every time. Avoid skin and eye contact and breathing vapours or spray. Use aerosols outdoors or with the ventilation specified on the can, away from flames, sparks and heat. Follow the product’s protective-equipment and storage directions; keep adhesives and sharp applicators away from children and pets.
06

When something does not stick.

Check the cause before adding another layer.

The cabochon or finding comes loose

Check the fit, contact area, surface cleanliness and full cure time. If a coating peels off with the glue, that coating may be the weak layer. Do not keep building glue over a failed joint; reassess the materials and choose a suitable attachment method.

The finish turns cloudy, tacky or changes colour

Give the product its specified drying and curing conditions. Compare your spare-piece test with an uncoated piece. If clouding, colour transfer or tackiness persists, stop using that combination; another coat may hide rather than solve the problem.

Can I use any glue on an elastic knot?

No universal adhesive recommendation covers every elastic. Follow the cord maker’s knot and finishing guidance. If the exact combination is not confirmed, test a spare knot or ask before applying glue to the finished bracelet.

How do I remove excess glue?

Use the adhesive maker’s cleanup method only after confirming it is safe for the underlying material. Acetone, alcohol and scraping are not universally safe for beads, coatings or plating. Do not soak finished jewellery in a solvent as a general cleanup method.
Does waterproof glue make the jewellery waterproof?

The adhesive claim describes the cured adhesive under the maker’s conditions. Paper, thread, finishes, metal components and other materials still have their own care limits. Follow the most delicate component’s requirements.

What should I bring when asking for help?

Bring the product name, both materials and, if possible, a spare bead or finding. Tell us whether it needs to bend, be washed or support a heavy focal. A photo of the package directions helps identify the exact formula.

Contact i-Bead Inc.